Mail merge can be used to create multiple documents simultaneously from various sources. The documents have identical layouts, formatting, text, and graphics. For personalization, specific sections of each document vary with individual content. Word can create documents with mail merge, including letters, envelopes, bulk mailing labels, and emails. There are three component documents involved in the mail merge process:
- The main document is your template.
- The data source for personalized information
- Your merged document, which is the result of both personalized and standardized content

Word and Excel Mail Merge Step by Step
First Step: Prepare personalized data in Excel for mail merge
The first and most crucial step in the mail merge process is to set up and prepare your personalized data. We will use an Excel spreadsheet as the data source for the recipient list.
Here are some recommendations to prepare your personalized data for a mail merge process. Please ensure the following:
- Column names in your Excel spreadsheet must match the fields you want to insert in your mail merge Word document. For example, you'll need separate data columns for first and last names to use a person's first name in your document.
- All data to be merged must be present in the first worksheet of your Excel spreadsheet.
- Data entries with currencies, percentages, and zip codes are correctly formatted in the spreadsheet so Word can adequately read the values.
- The Excel spreadsheet file to be used in the mail merge is stored on your local machine or is accessible on a shared network folder.
- Changes or additions to your spreadsheet must be completed before processing your mail merge document in Word.
Second Step: Start the Word mail merge process from the Ribbon Menu
- In Word, choose File > New > Blank document.
- On the Mailings tab, in the Start Mail merge group, choose Start Mail Merge and choose the merge you want to run.
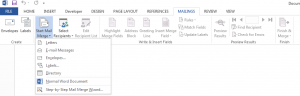
- Choose Select Recipients > Use an Existing List.

- Locate your Excel spreadsheet, and then choose Open.
- When Word prompts you, choose Sheet1$ > OK
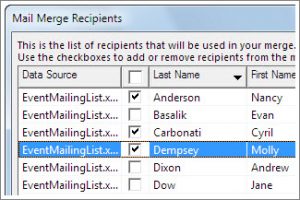
Edit the mailing list.
Select who receives your mail.

- In the Mail Merge Recipients dialog box, clear the check box next to the name of anyone you don't want to receive your mailing.
- Select rows by checking the check box
Third Step: Insert a merge field
You can insert one or more mail merge fields that pull the information from your spreadsheet into your document.
To insert an address block for an envelope, a label, an email message, or a letter
- On the Mailings tab, in the Write & Insert Fields group, choose Address Block.

- Insert Address Block merge field
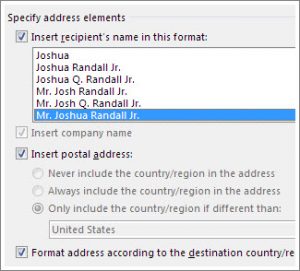
- Choose OK
- Choose File > Save
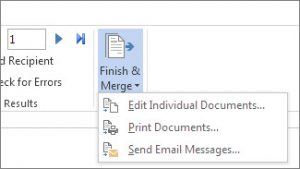
Fourth Step: Preview and finish the mail merge
After you insert the merge fields you want, preview the results to confirm that the content is okay. And then, you're ready to complete the merge process.
- On the Mailings tab, choose Preview Results.
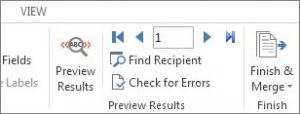
- Choose the Next Next record button for mail merge preview results or Previous Previous record button for mail merge preview results record button to move through records in your data source and view how the records will appear in the document.
- In the Finish group, choose Finish & Merge, and choose Print Documents or Send Email Messages.
Well, I am done! As a final step, you can save this mail merge for use in the future.
This piece was originally posted on August 30, 2018, and has been refreshed with updated styling.